
Spring is here and we have been so excited to see sun, flowers and even the occasional butterfly!
These rare sightings bring so much excitement to my little guy and when I saw this easy butterfly craft, I knew it would be the perfect project for a sunny spring day!
The best part about this craft is that it requires minimal supplies and almost no mess or clean up!
This simple butterfly craft is easy, cute and the perfect craft for spring and is a favorite spring activity for toddlers!
A hungry caterpillar craft would be the perfect pair activity! Or if it’s currently fall, you could create this fall leaf butterfly craft.
Option #1
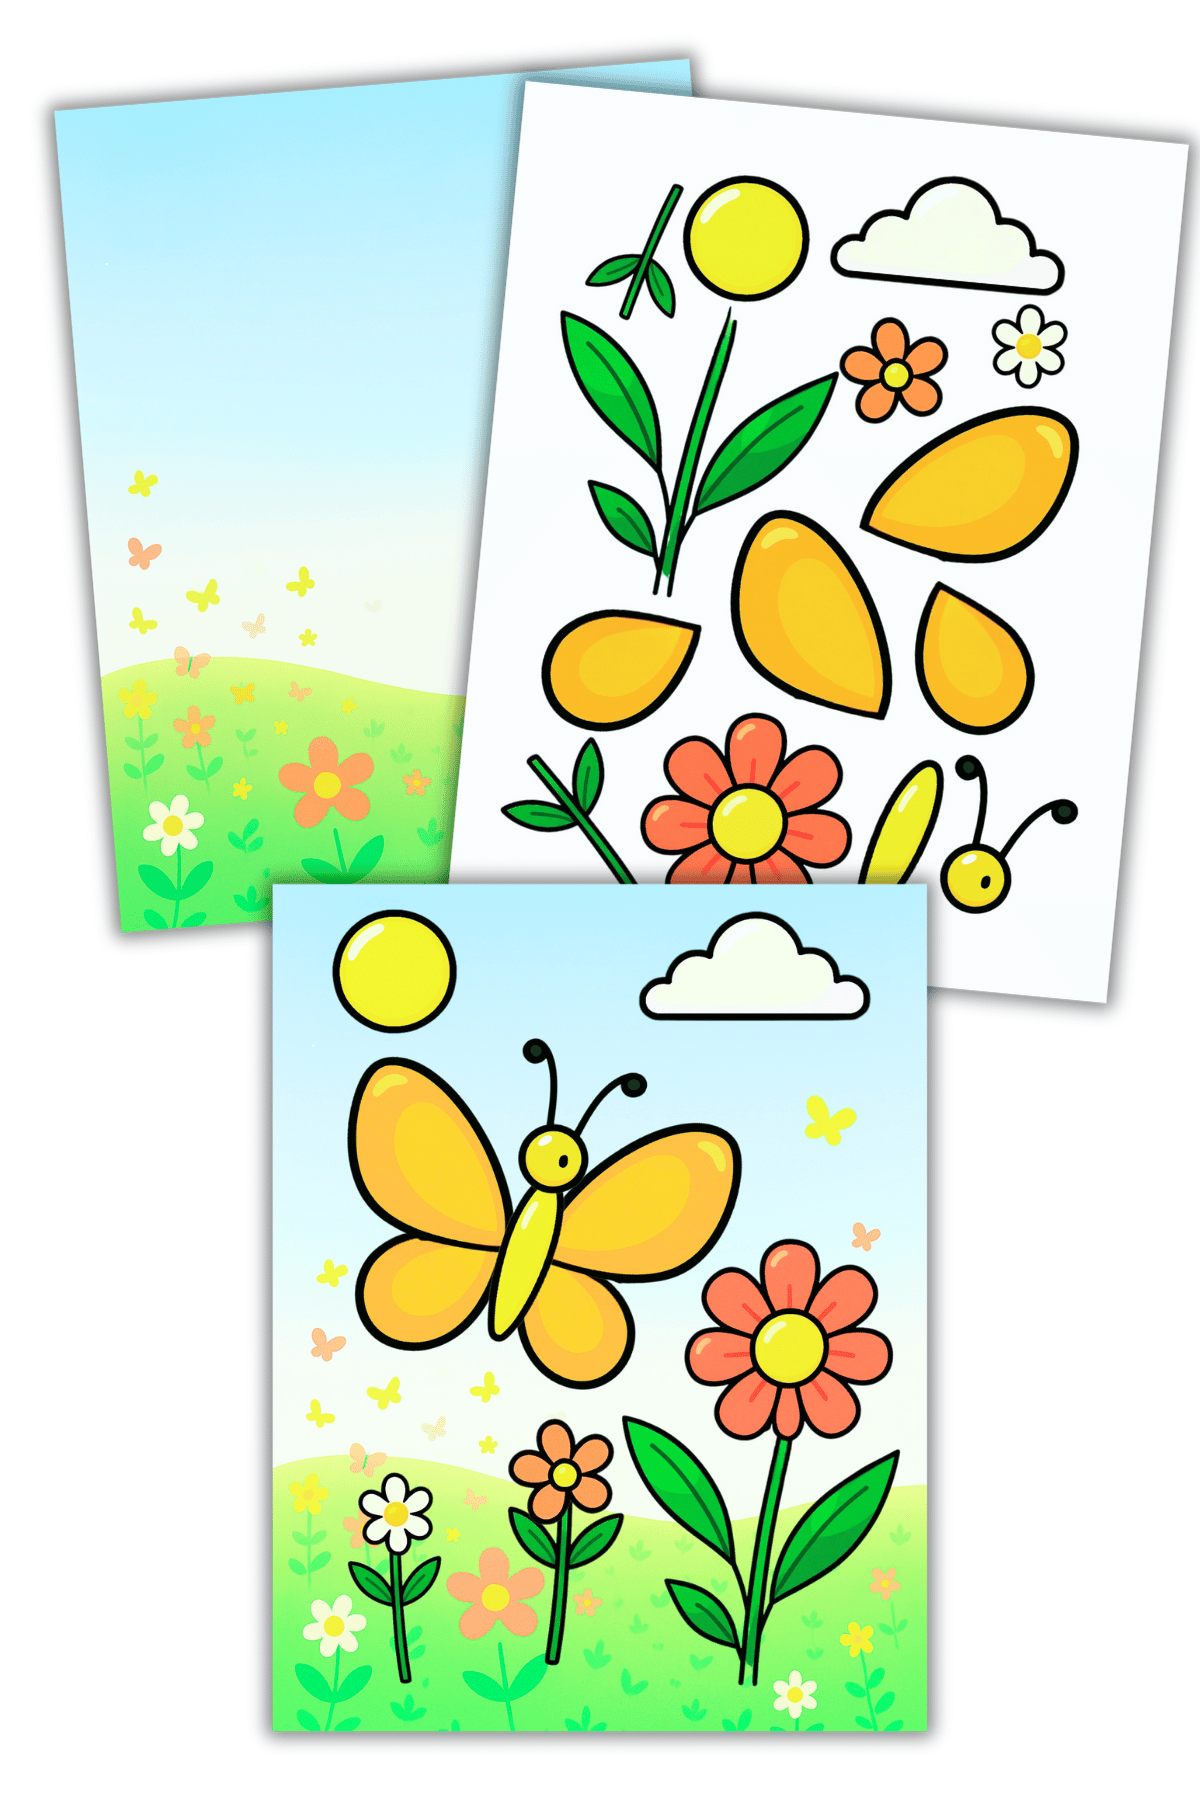

Butterfly Craft Option #1 PDF
Love crafts like this but hate the cutting and printing? We’ve got the perfect solution!
Printable Butterfly Craft- Option #2 and #3

This beautiful butterfly craft comes with two different versions and both are super easy and so much fun!
You could also grab some butterfly coloring pages for more butterfly fun.
This is a great art project to do that doesn’t take up a ton of time and only requires a glue stick, white paper, a black marker (or sharpie) and scissors!
Butterfly Craft Suggestions
These butterfly printables are for kids of all ages and are a fun way to celebrate the arrival of spring!
Here are some suggestions to help make this craft even easier:
- One of the best tricks to make this simple craft even easier is to have your child add their own butterfly design before cutting out. This takes away the stress of coloring little pieces or losing a piece before it’s time to use the glue stick.
- It might be helpful to show your child pictures of butterflies and point out the different wing patterns some butterflies have. This may also spark some creativity on what type of designs they can add to their butterfly!
- If you love this cute butterfly craft as much as I do, you can turn your child’s butterfly (this would work with option #1 below) into a magnet for your fridge! This would be so cute to have up all of spring and your child will be so proud to see it featured on the fridge. Simply glue a magnet to the back of the butterfly- hot glue works great for this! You can buy magnets at any craft store or repurpose an old magnet!
Printable Craft Steps
Here are some step-by-step instructions for both butterfly printables:
Step #1: Print out your free template on white paper (the template can be found at the bottom of the post).
- It will be much easier for kids to assemble if printed on card stock or a thicker paper than computer paper.
Step #2: Design your butterfly
- This is the time for your child’s creativity to shine! They get to add a fun design to their butterfly’s wings. They may want to draw stripes or polka dots or even rainbows on the wings (my son is ALL about the rainbows right now!) Whatever they want to do, they get to make it their own!
- Have your child use a black marker (or a sharpie if you are a thrill seeker who isn’t scared of the word permanent) to draw black lines and designs on their butterfly wings.
Step #3: Cut out all the pieces of your butterfly’s body.
- Cutting can be hard and the curves around the butterfly’s body may rock your child’s world. If they need help, help them, but try to give them a small section they can be successful at even if it’s just cutting off some of the white edges- small successes are huge for little hands learning to cut! (This is also fine motor skills practice!)
Step #4 Glueing time!
- It can be really helpful for little kids and even older kids to lay out the pieces in the order you are going to glue them on.
Step #5 Finishing touches!
- Glue your butterfly body on either the background provided or any background you prefer. (Construction paper also works great!)
- This is the step where your child can make it their own unique butterfly! Add anything fun like glitter, pom poms for spots on the wings, anything that your child wants!
I bet your child’s butterfly art will look AMAZING!
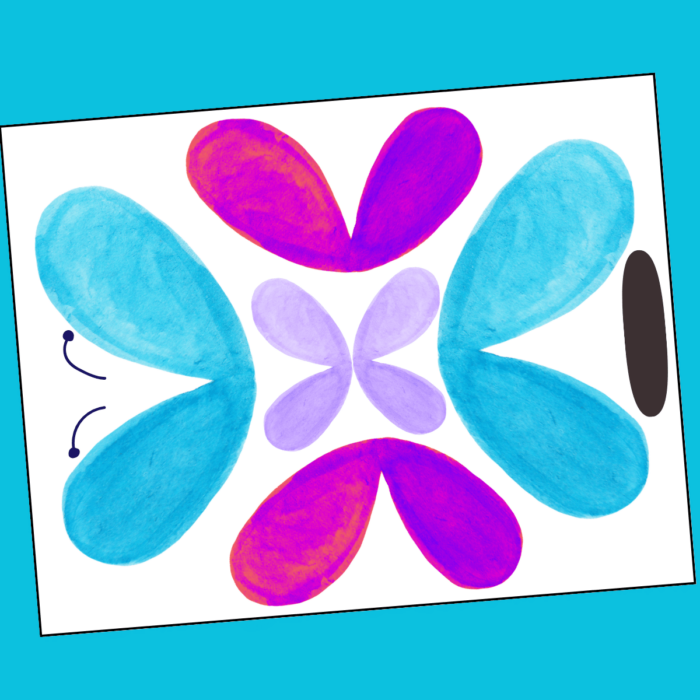
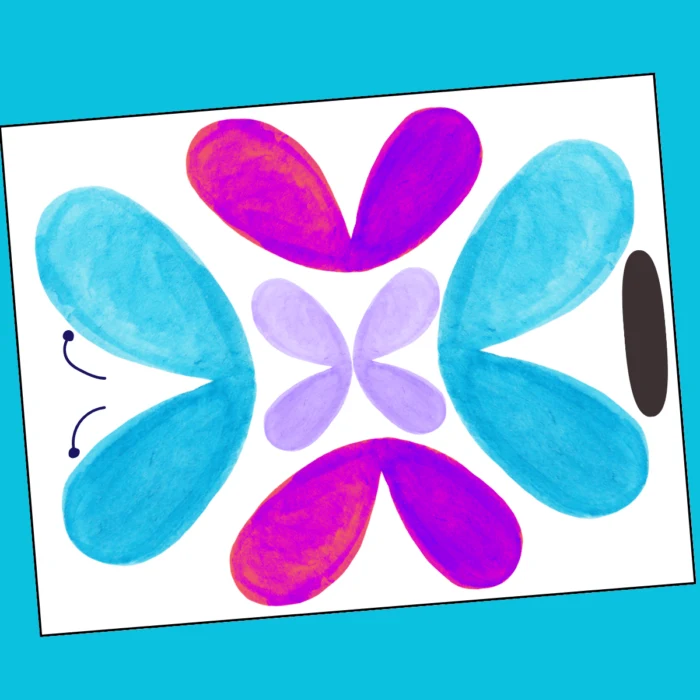
Option #2
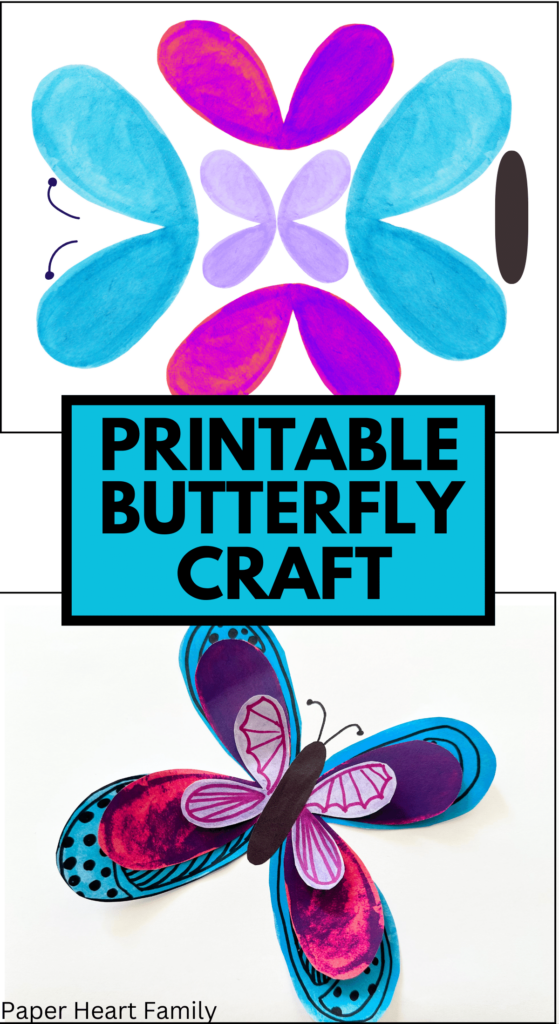
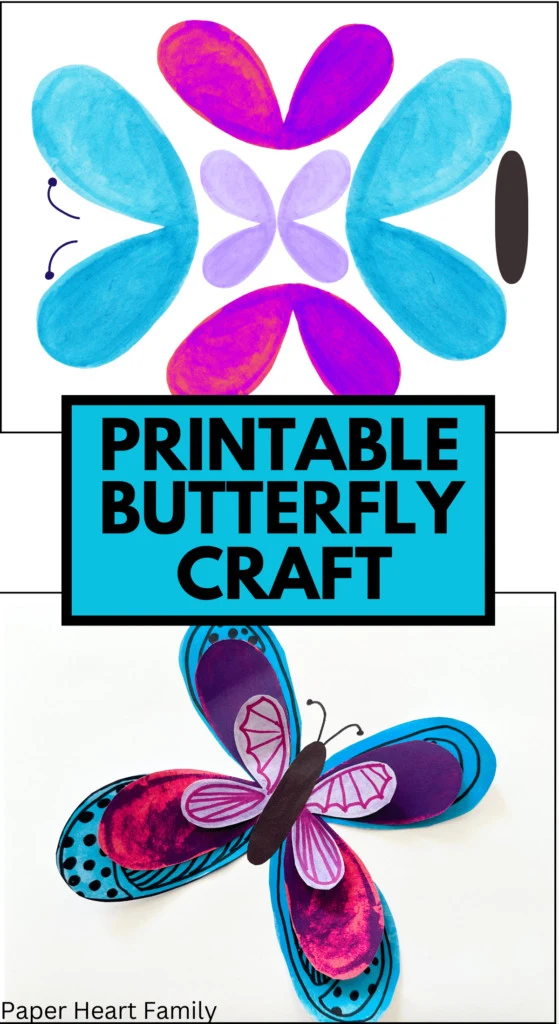
I love this first option! This beautiful butterfly craft is one I would want to keep up all spring!
Assembling instructions:
1. Before cutting out, have your child draw designs on the butterfly wings using a black marker or sharpie. This is such a great activity to introduce symmetry and show kids how butterfly wings are the same on both sides. Of course if you child is like mine, they may want the wings to all be a little wacky and different- that too is wonderful! This is their own unique butterfly and will look awesome however they design it!
2. After cutting, make sure to lay out the pieces in the order they need glued. The butterfly wings only need glued in the center so that the wings can give the illusion of being 3D. The butterfly’s body will just need glue in the center.
Suggestion:
A great trick to help younger children (and even older children) with gluing in specific spots is to draw a line in pencil on the back of the paper (where the glue will go) and have your child use their glue stick on that line only. I do this for most projects because my son LOVES glue sticks and the fun purple color it can make on paper and if he doesn’t have a spot to focus on, the paper will be mostly glue. This trick is also a great way to practice fine motor skills!
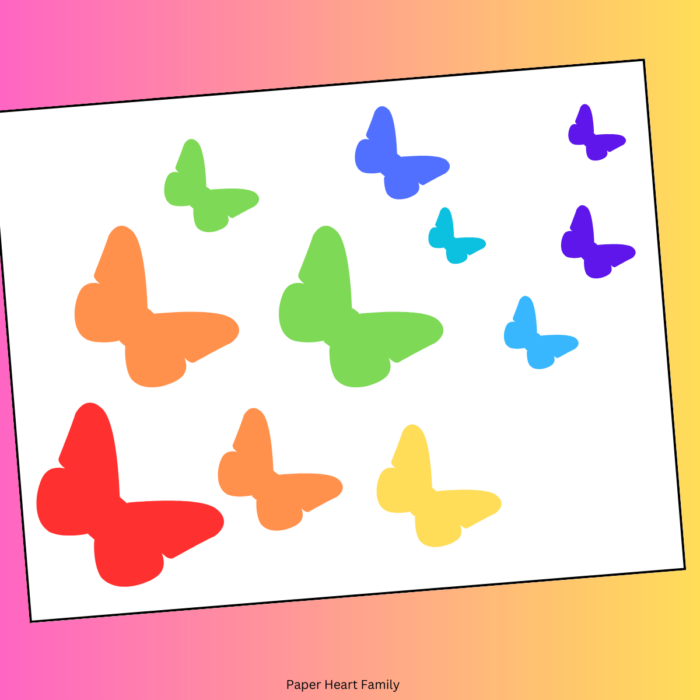
Option #3
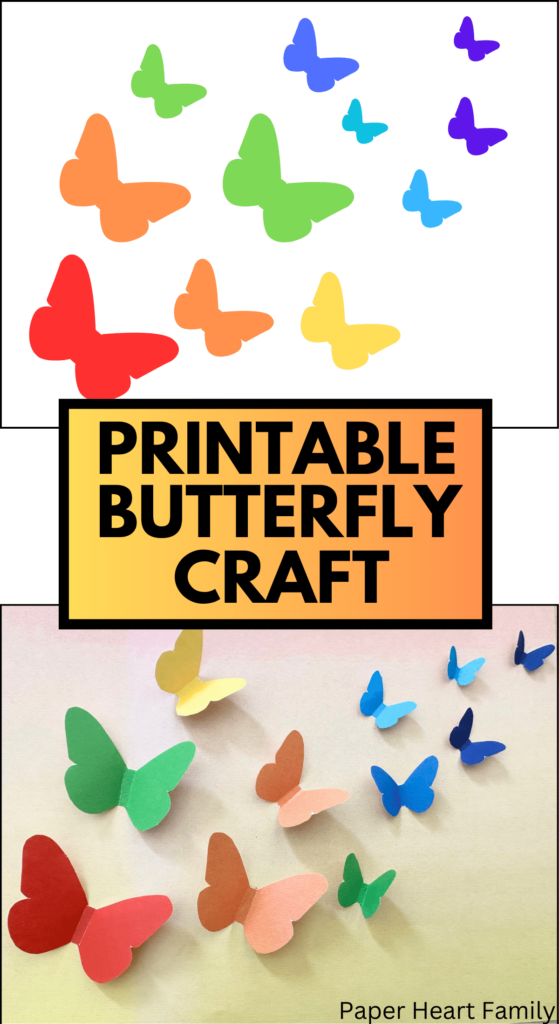

This colorful craft is so much fun, plus the butterflies are rainbow colors- SO CUTE!
Assembling instructions:
1. Cutting out the butterfly shape might be tricky for little hands! A great way to share the cutting with younger children is to have them cut off the white edges and then you can cut the butterflies out. This gives them a little fine motor skills practice and also helps build kid’s confidence with cutting!
2. After the butterflies are cut out, you will want to bend the butterfly wings slightly at the center of the butterfly’s body. Focus on one wing at a time and bend it up towards the center, creasing at the center of the butterfly’s body. Even the slightest crease will give you the 3D effect.
3. Lay out your butterflies and glue one on at a time- only putting glue in the center of the butterfly’s body. This is another great time to use the gluing trick (see option 1!)
Option #3- Optional Background


This optional background is a fun way to add a little more color to your child’s butterfly art!
Glue directly to this background or feel free to use anything you have around your house- construction paper works great too!
Download Your Free Printable
To download your free printable, simply click below.
And if you’re thinking your kids will love this craft, check out our dinosaur printable craft, ice cream craft and bat craft!
Printable Butterfly Craft
Please remember that these printable files are for personal use or classroom use only (non-commercial use).
I hope you and your littles enjoy this easy butterfly craft!
Free Printable Dog Craft That's Paw-Some!
Friday 13th of March 2026
[…] Butterfly Craft […]
Free Printable Puppy Craft For Pug Lovers
Wednesday 31st of December 2025
[…] Butterfly Craft […]
Free Printable Fish Craft For Kids To Make With Paper
Wednesday 1st of November 2023
[…] an animal lover? Make sure you also check out our dinosaur craft printable, butterfly printable and bat printable! Let me know how this craft went in the box […]
30 Mom And Toddler Activities You'll Both Love!
Saturday 15th of July 2023
[…] cream craft, a butterfly craft or these letter crafts will all help your child to better develop their cutting […]
20 Brain Development Activities For 2 Year Olds
Monday 12th of June 2023
[…] this dinosaur craft or butterfly craft with your child and see what their little hands can […]